This guide will explain how to solve a Rubik’s cube in five (5) steps. For the first half, we’ll put WHITE on the top and halfway through we’ll switch to YELLOW on the top. Also, the algorithm steps are from left to right, then top to bottom.
1. First Layer Sides
Okay so I’ve decided to not include steps for how to get the white cross because I think it’s the only reasonable “problem-solving” part of the cube. You’ll need to figure out how to make a WHITE cross on the top of the cube (don’t worry about the corners). Make sure the sides are lined up with the correct colour like in the picture below on the left. Good luck and have fun.
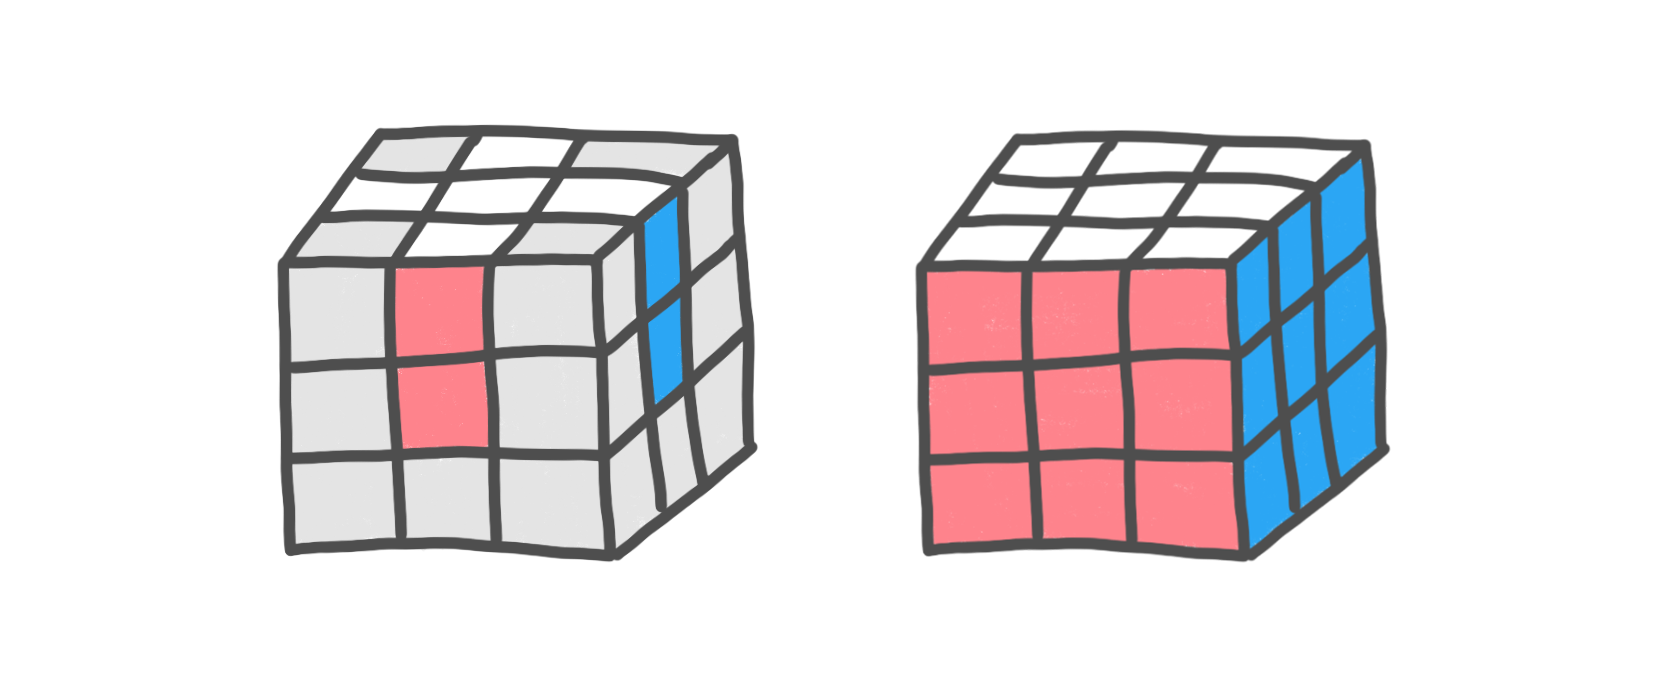
2. First Layer Corners
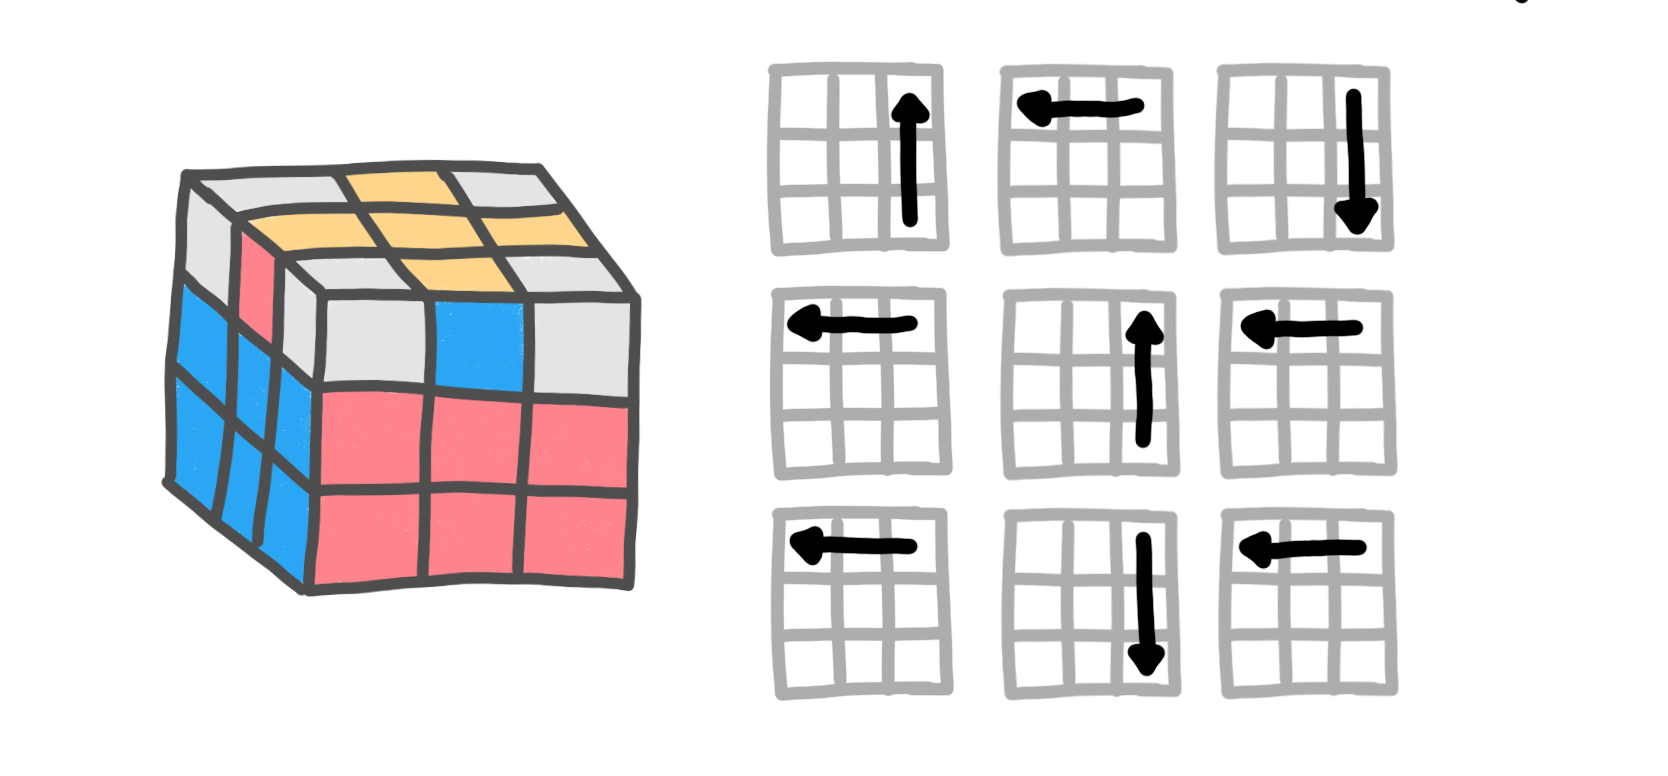
Now we can start with the mindless algorithms. With WHITE on the top, find the corner piece that goes in the top-right corner (in the image it’s the WHITE-RED-BLUE piece) and line it up somewhere on the right side.
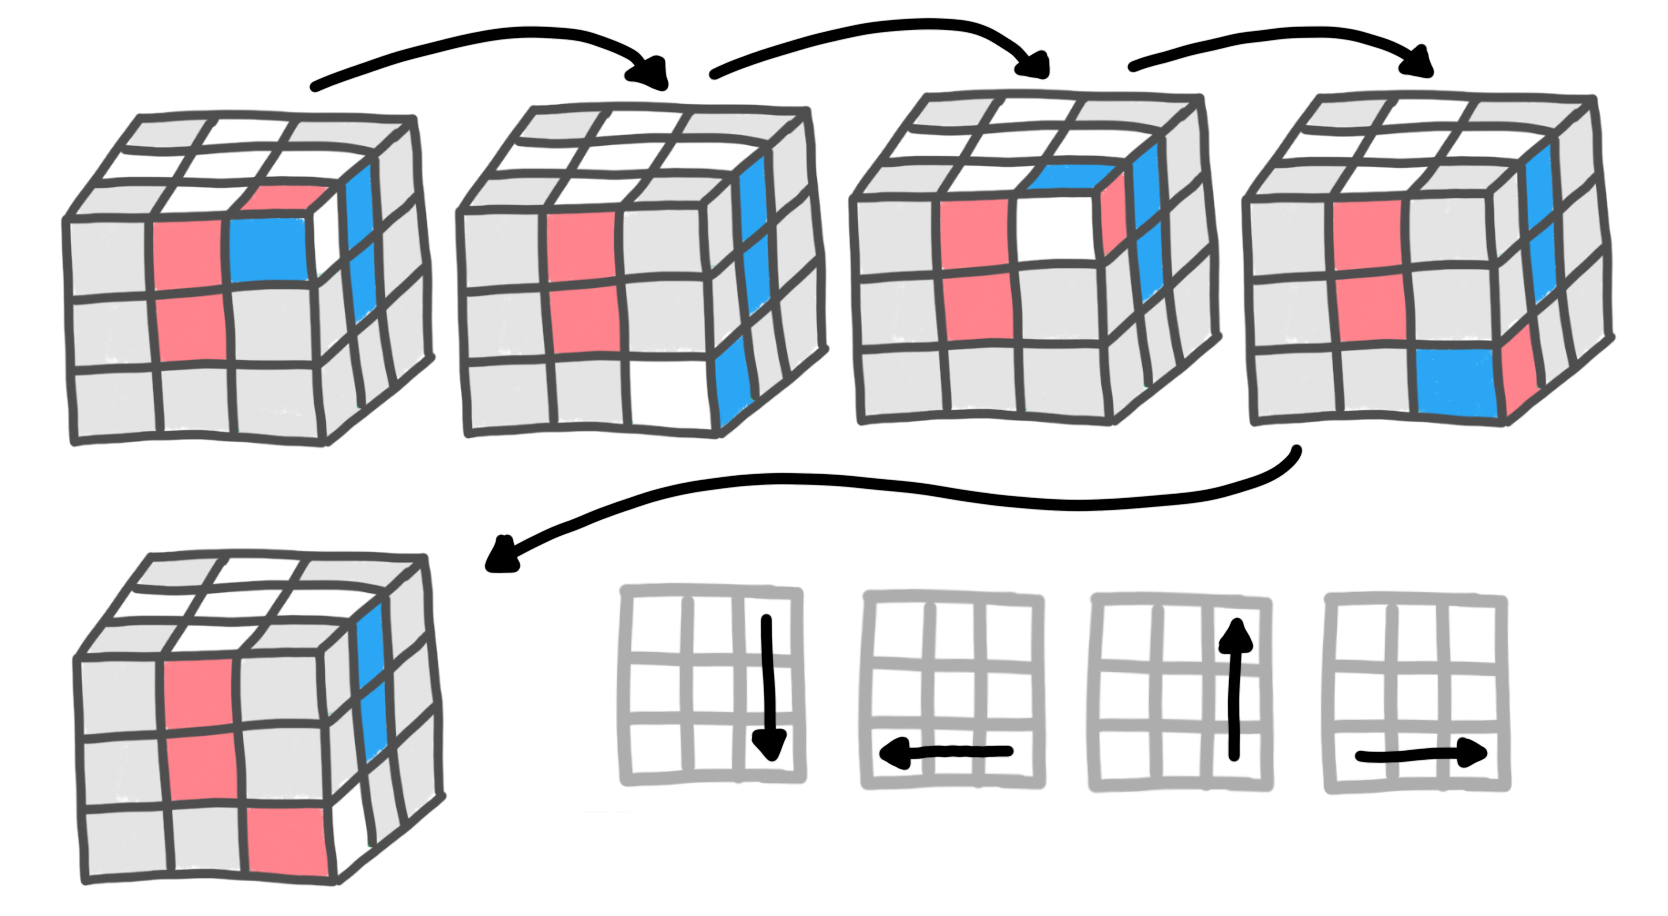
Repeat the shown algorithm with WHITE on the top until the corner piece is in the correct position with the correct orientation. Repeat this step with all 4 WHITE corners.
Note: If the corner you’re looking for is in the top layer but in the wrong position or wrong orientation, do the algorithm with the piece in the top right.
3. Second Layer Sides
With WHITE on the top, orient the bottom layer so that it matches one of the positions in the image below and do the associated algorithm depending on the direction.
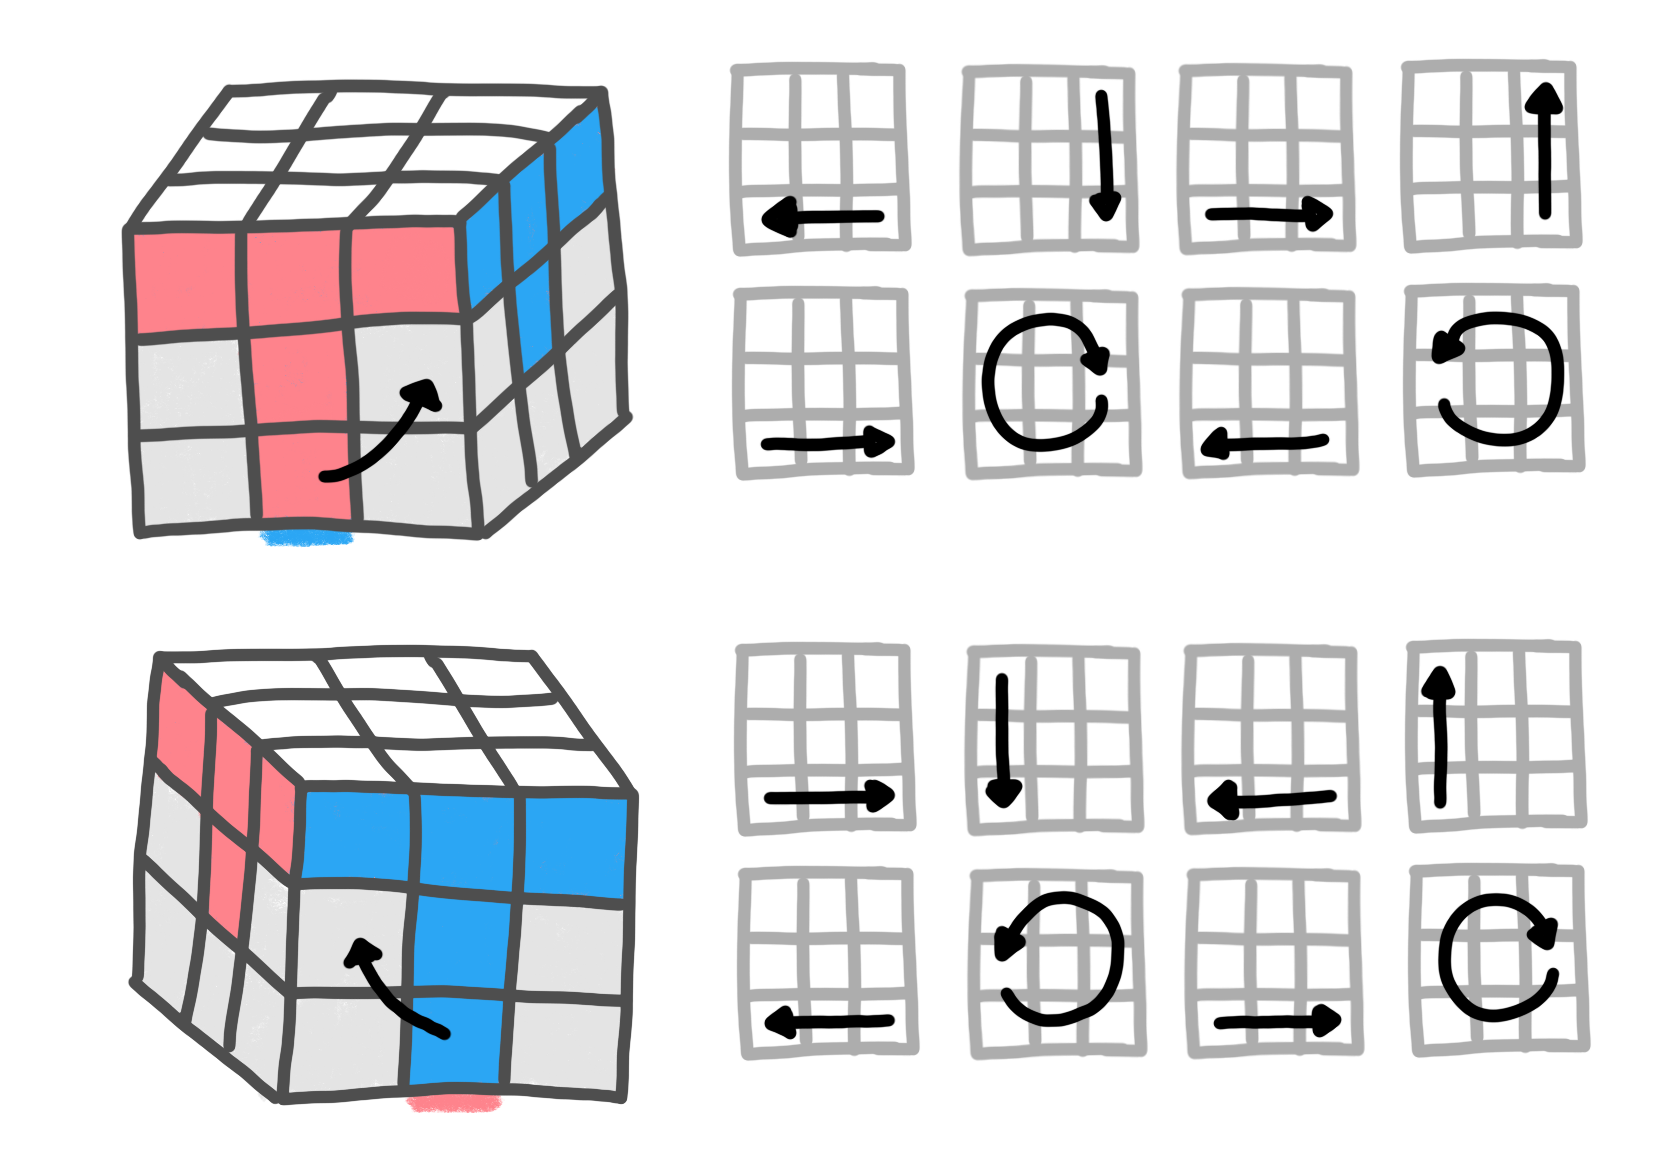
Note: If the piece is in the correct position but the wrong orientation, do one of the above algorithms to put a different piece in that spot and then preform the algorithm. You can use this tip if none of the correct pieces are in the bottom row.
4. Third Layer Sides
The first two layers should be complete! Flip the cube over so that YELLOW is on top. Orient the cube so the YELLOW sides match one of the patterns below (don’t worry about the corners). Repeat the algorithm until you complete the YELLOW cross.
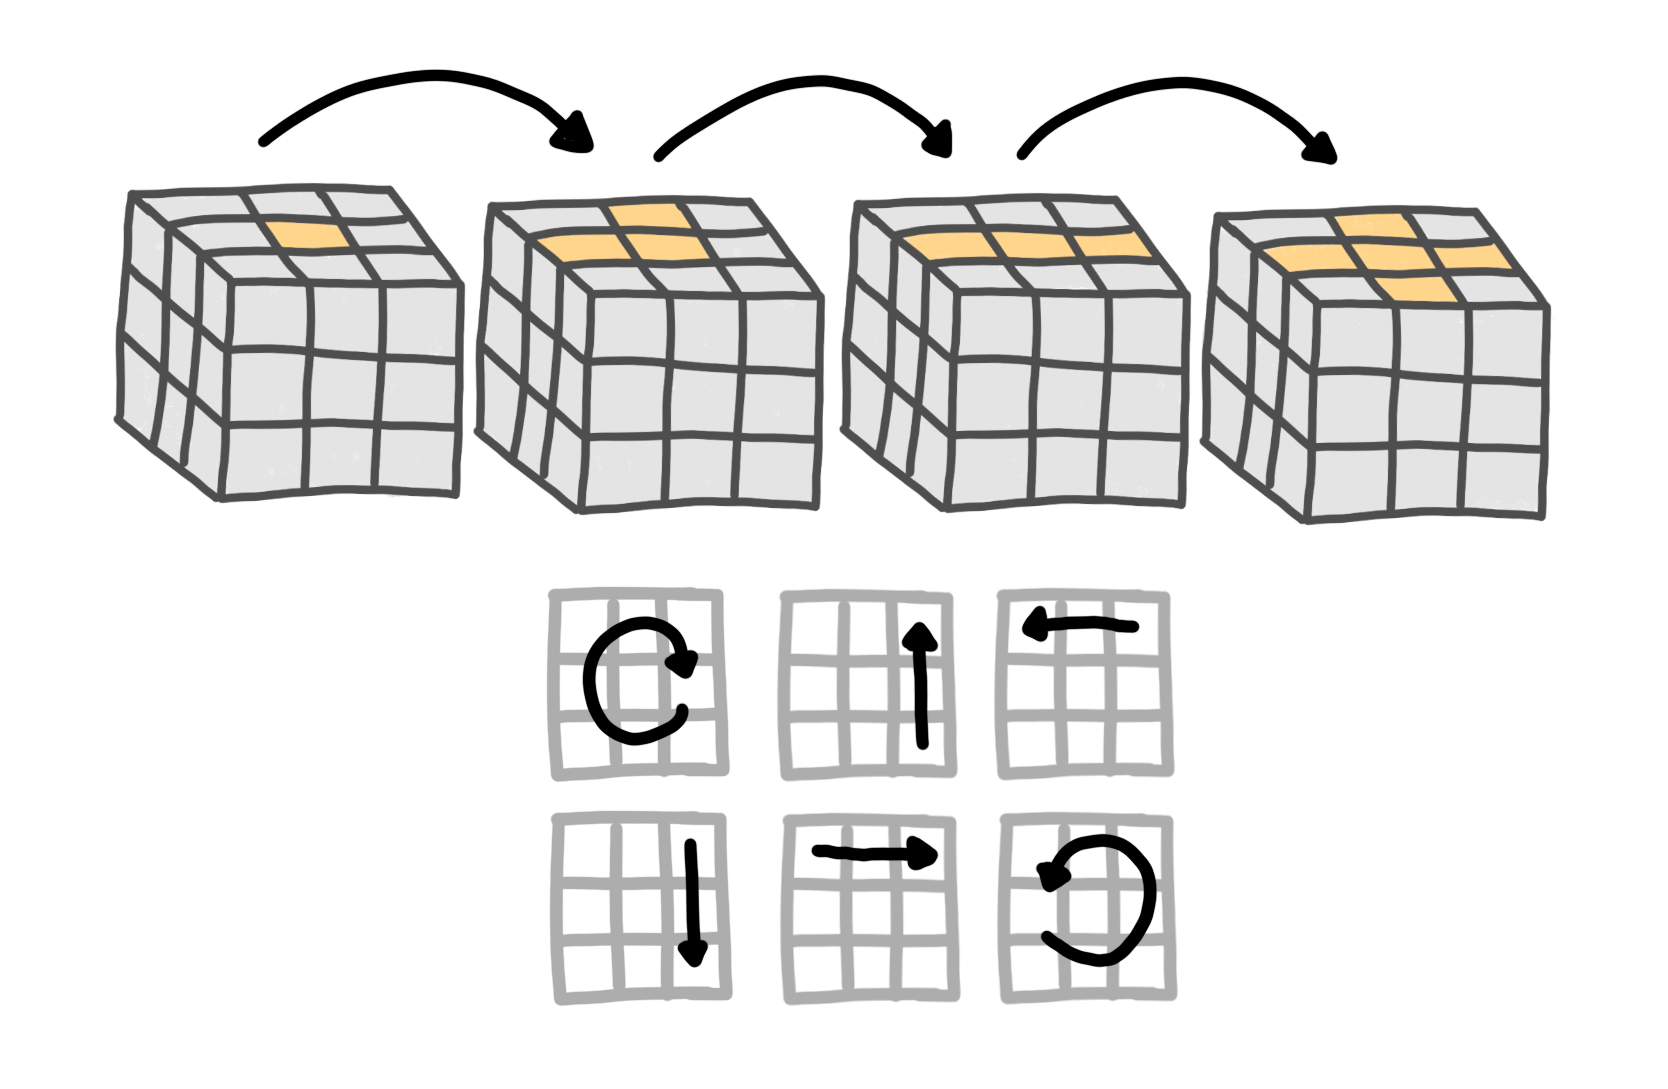
Twist the top until the most YELLOW side pieces line up with the correct colour on the sides. Use the following algorithm to swap two YELLOW side pieces.
5. Third Layer Corners
With YELLOW on top, find a corner with the correct position (doesn’t need to have the correct orientation) and put that in the front-top-right of your hold. Perform the algorithm until all corners are in the correct position (don’t worry about orientation). If no corner is in the correct position, do the algorithm with any side as the face and then find a correct corner.
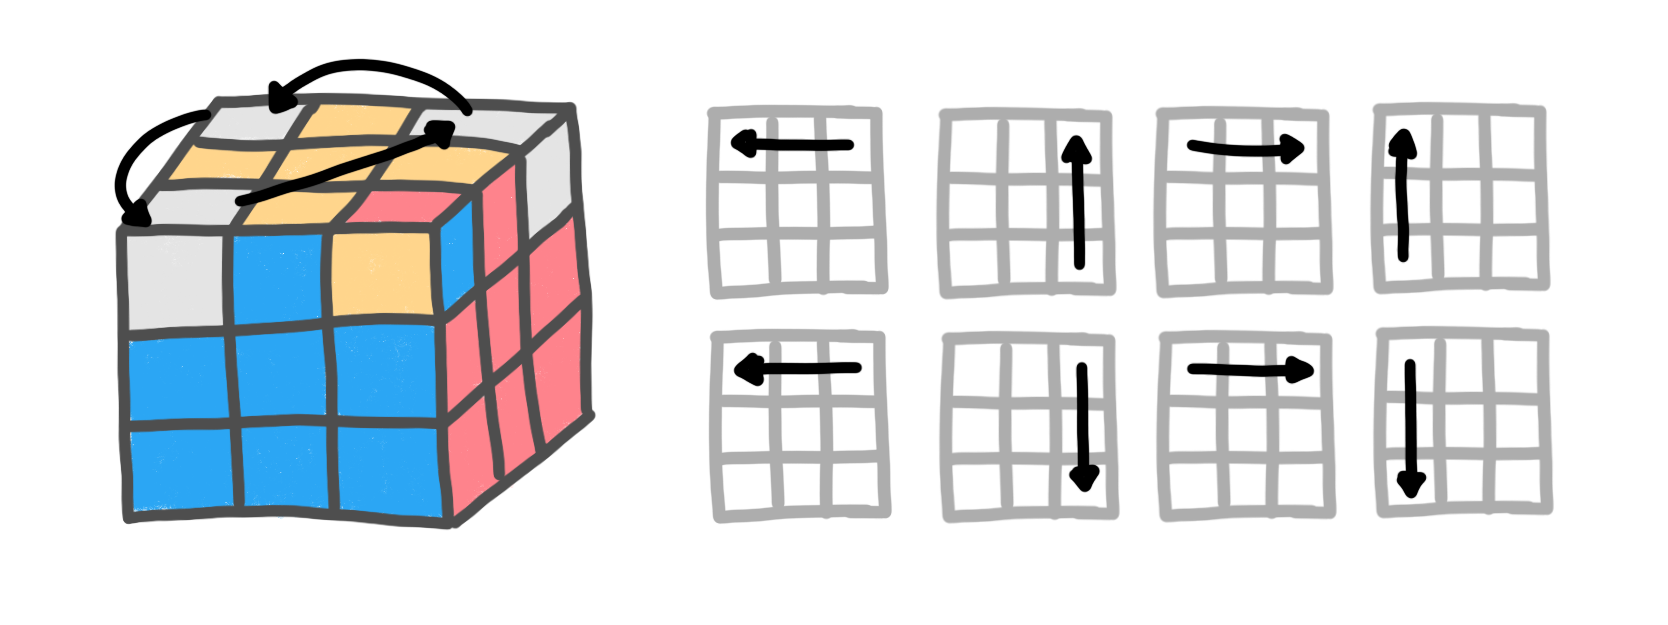
Note: This next part gets wonky and temporarily screws up the progress we’ve made in other areas. Trust yourself and keep going.
All corners should be in the correct position (but maybe not the correct orientation). With YELLOW on top, perform the following algorithm until the corner is in the correct orientation. Don’t change your front side - Rotate the top layer so the next wrong-orientation corner is in the top right. Repeat this algorithm until the corner is in the correct orientation. Do this for all corners until the top layer is complete.
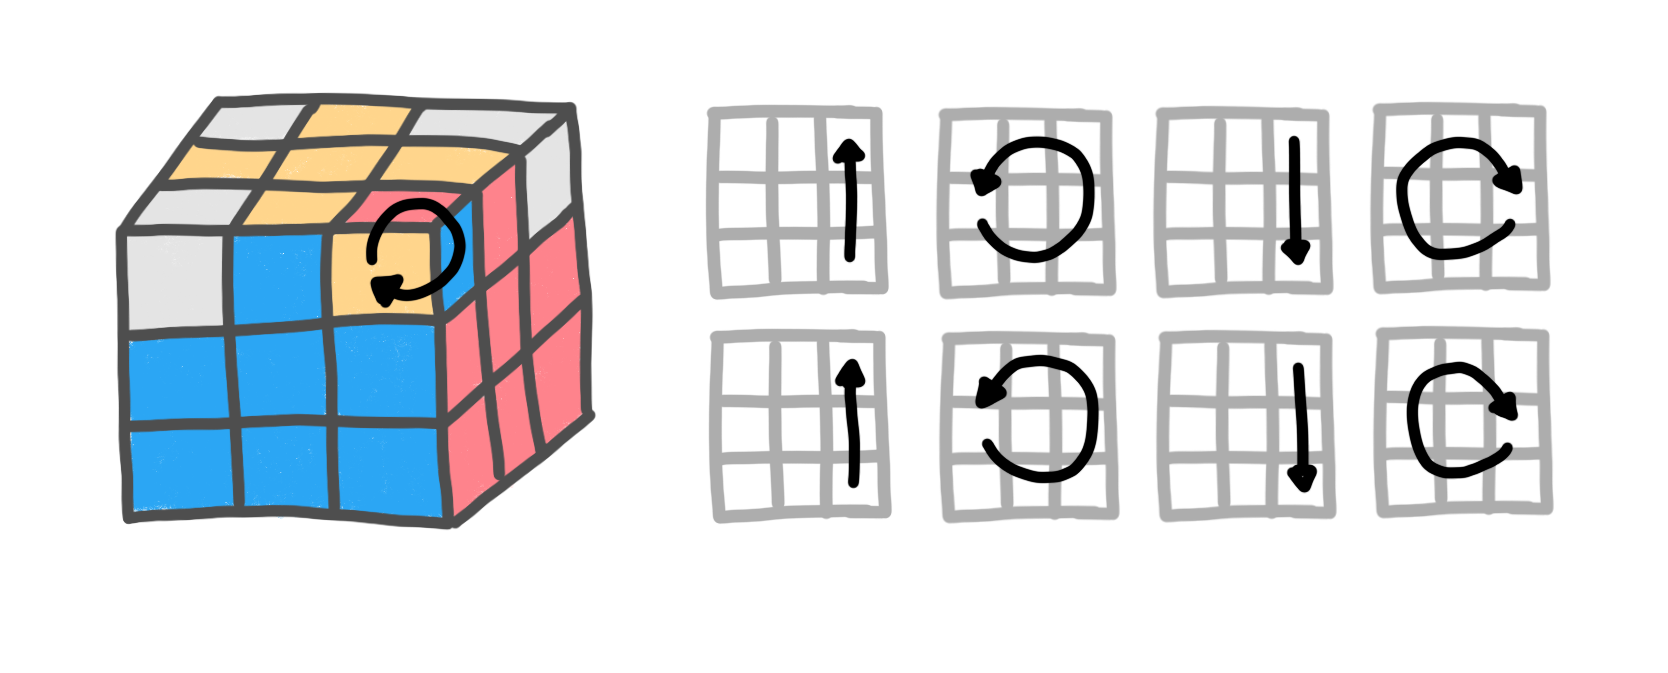
You might need to do a final twist on the top layer to line everything up.
I really hope that made sense. I think the pictures do at the very least. Here is a link to the tutorial I used.